How To Make Charcuterie For 15: Step by Step Guide
Learn how to make a charcuterie board for 15 people! Includes shopping list and tips and tricks for arranging.
Ready to upgrade your charcuterie board game? I’m here to help! Through 2020 and 2021, I made hundreds of charcuterie boards! A friend requested that I make her a small board for her wedding anniversary. She posted a photo of the board I made for her, and the requests started flooding in.
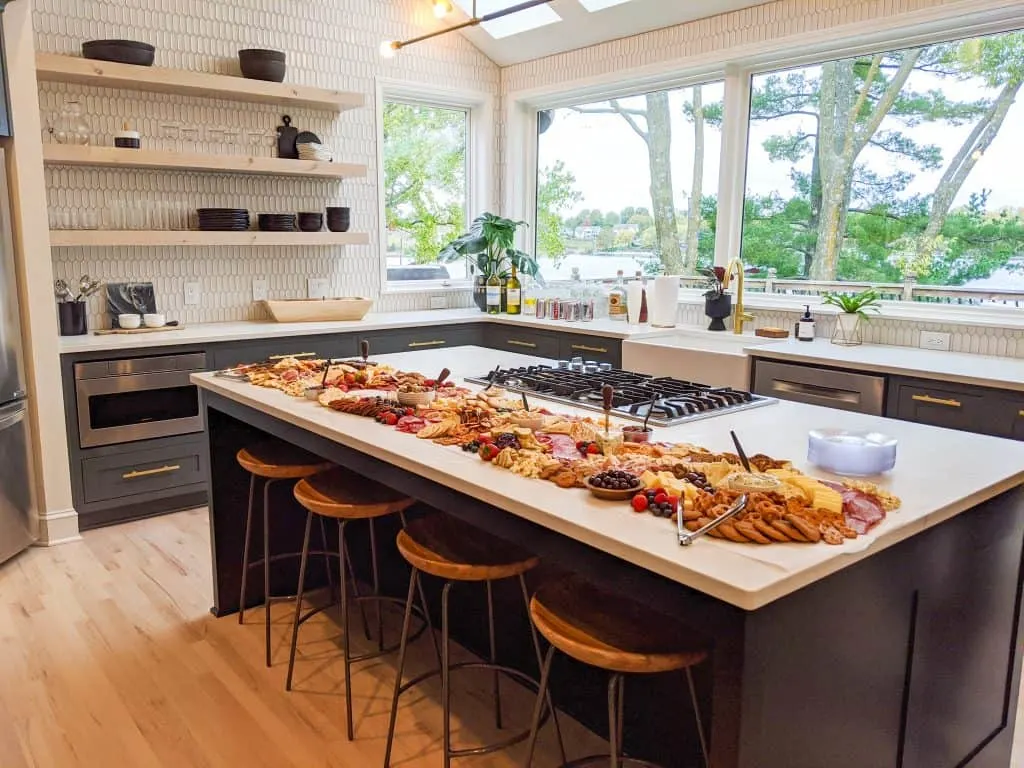
If you are preparing for a larger group, check out my original post: How to Make a Grazing Table for 40 people.
It was the perfect way to bring joy to people staying at home. And once life started happening again, I even did charcuterie cups for a wedding, which was so fun!
This post is intended to help you put together charcuterie for 15 people. It includes a list of equipment you’ll need and tips and tricks for arranging your charcuterie.
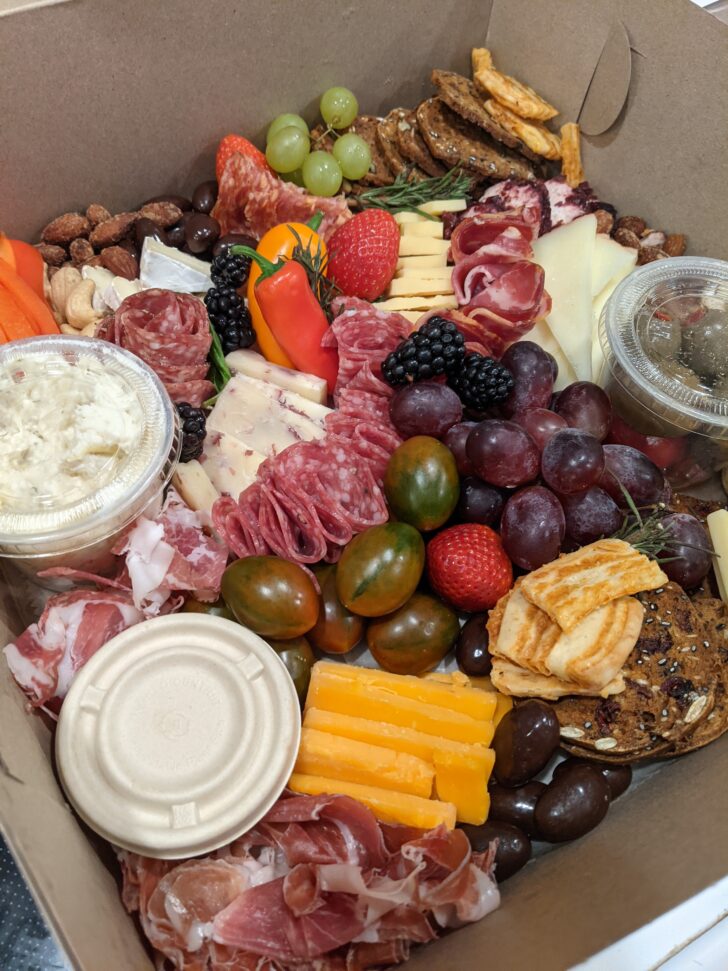
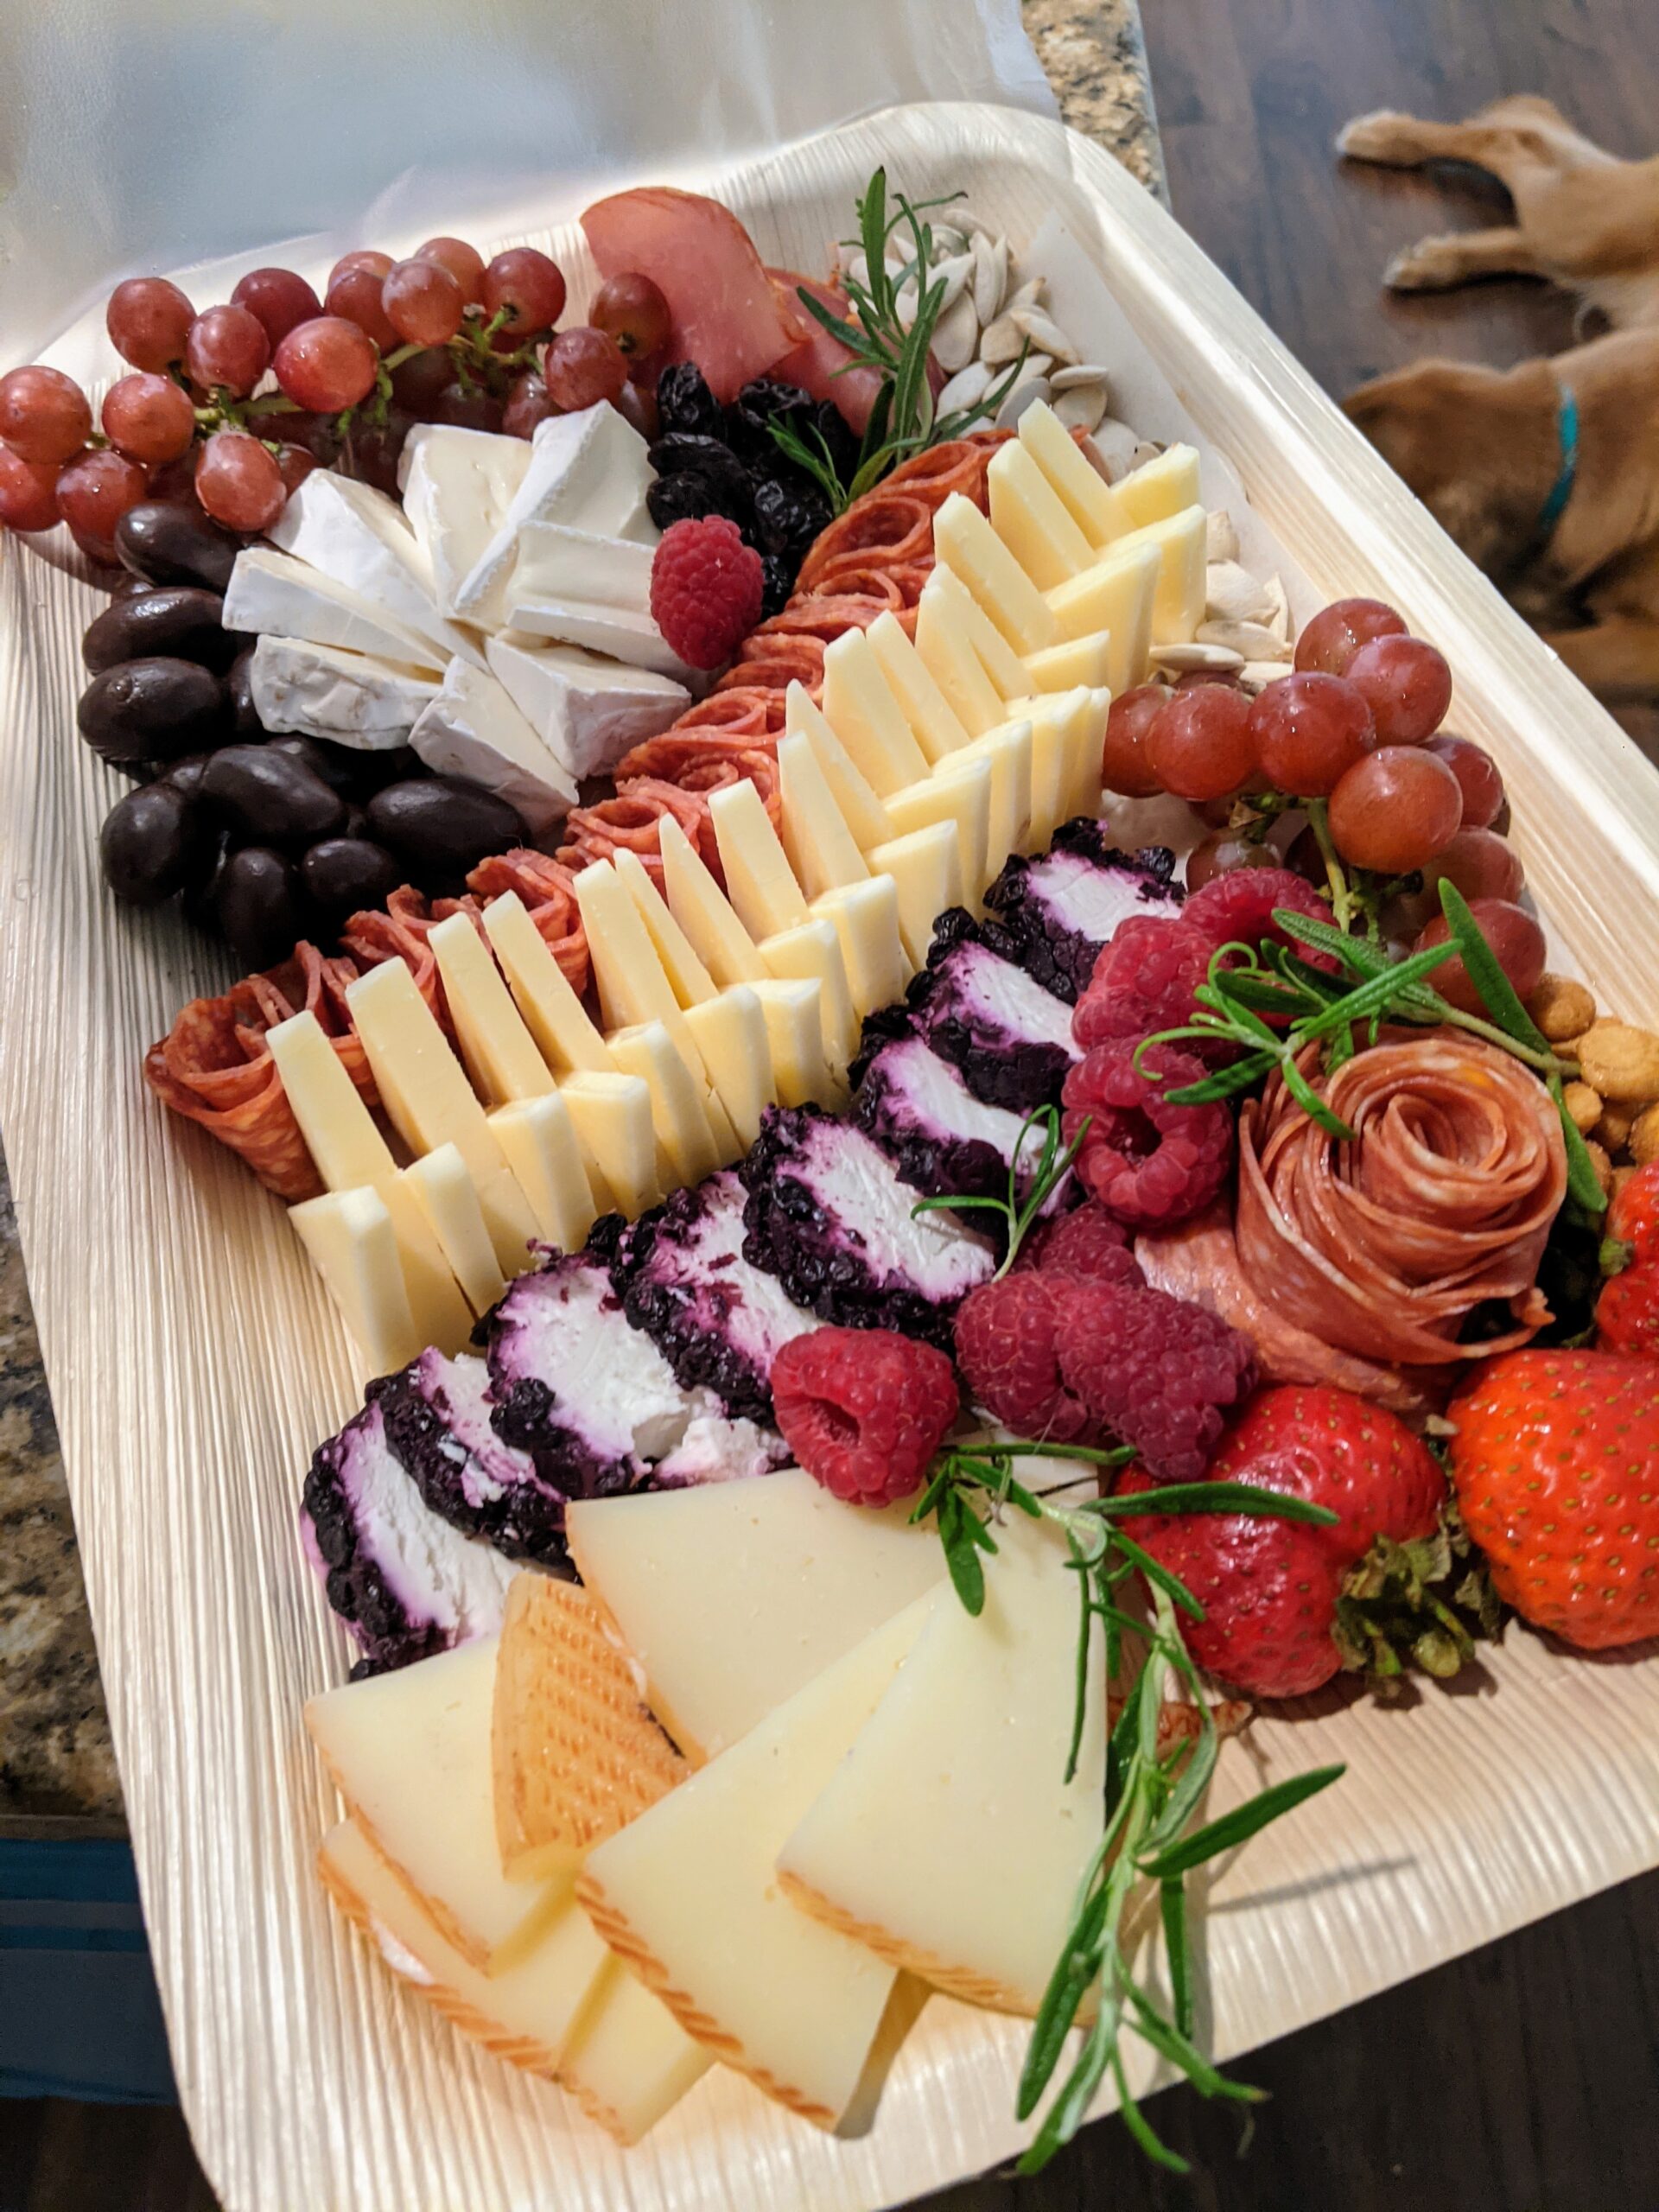
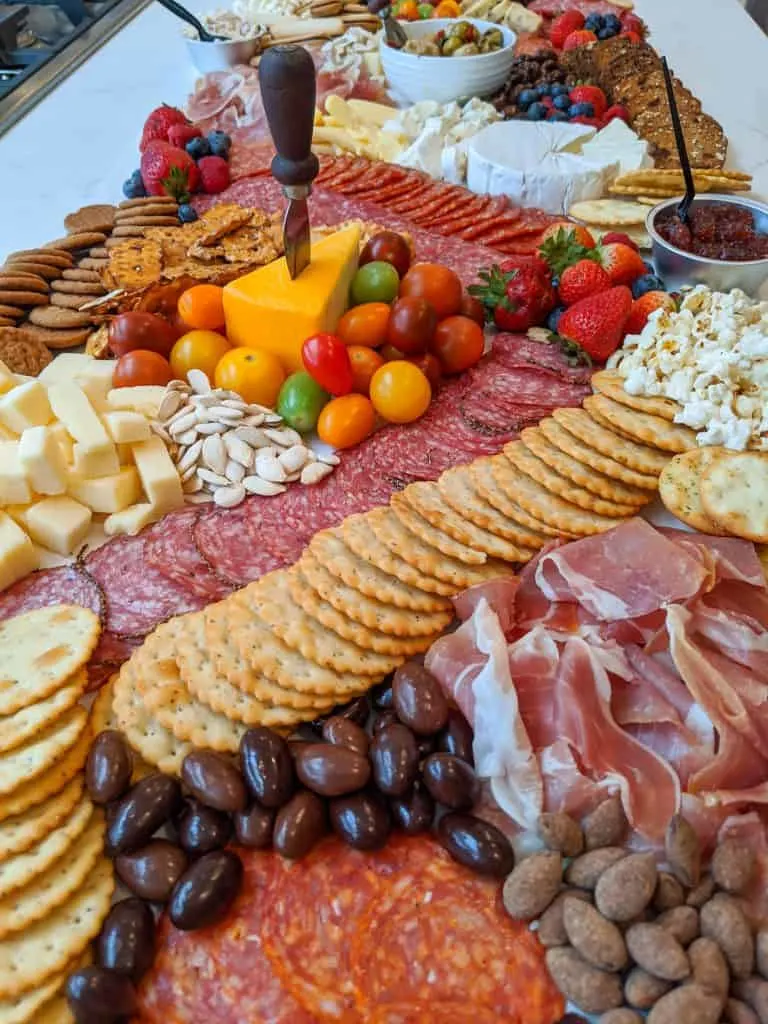
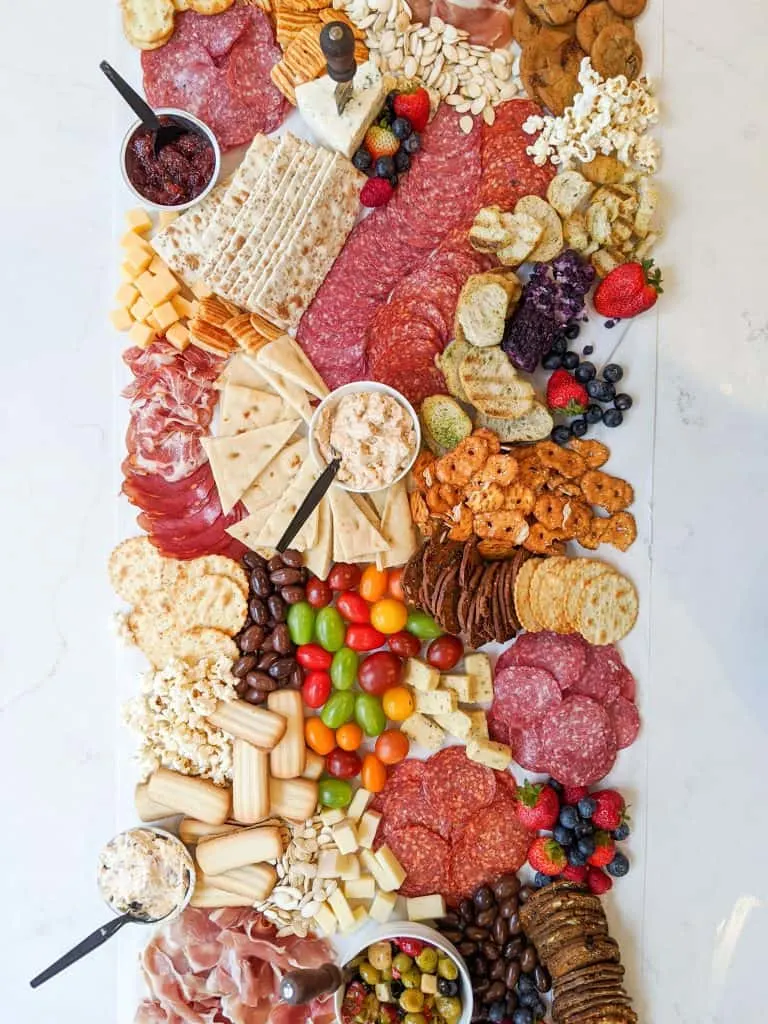
Before I get to the steps, I want to make sure I tell you about the charcuterie “Rule of 3!” For the best experience, try to follow the 3:3:3 ratio. 3 types of cheese, 3 types of meats, and at least 3 accompaniments! If you follow my instructions below, you will be more than covered with enough variety to make your charcuterie interesting and fun to eat!
“You are a lifesaver. I’m 34 weeks pregnant, finishing work this week, and it’s two weeks til Christmas. My fiance has invited 20 people around on Saturday for baby shower/leaving drinks, and I could not get a caterer for love or money. Neither do I have two brain cells to rub together to put on a grazing table. This is absolutely brilliant, thank you!!!”
Step 1: Decide the Location of your Charcuterie Board
You may be stressed that you don’t have a board big enough to hold everything. That’s okay!
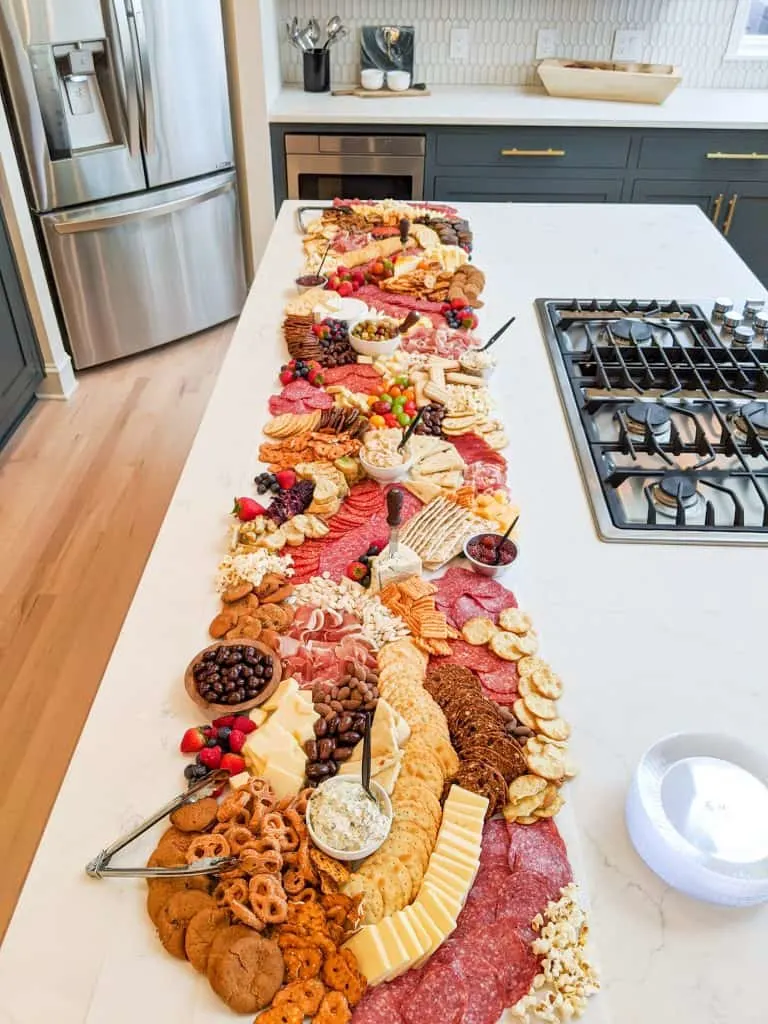
A sanitized countertop or a portable table is a great option for your grazing board.
You can choose to lay butcher paper or parchment paper down, or put the items directly on the countertop.
You can also make multiple boards to spread across different rooms of the house or party.
Step 2: Shop for your Charcuterie Board Ingredients
With the rising price of well, everything, putting together charcuterie for a group can be quite expensive.
I typically shop for my charcuterie ingredients at Aldi. They have a wonderful assortment of specialty cheese, pickles, olives, cured meats, crackers, dried fruit and nuts, especially during the holiday season!
I can typically get everything I need for my charcuterie boards around $5 per person at Aldi.
If you don’t have access to Aldi, I recommend using another budget option like Walmart, Sam’s Club or Costco. While they won’t have super specialty options, you’ll be able to get the basics at an affordable price.
You truly don’t need to splurge to make a beautiful spread!
Step 3: Arrange your Charcuterie Board ingredients
Making a charcuterie board is truly more of an art than a science, and you get better at it the more of them you do!
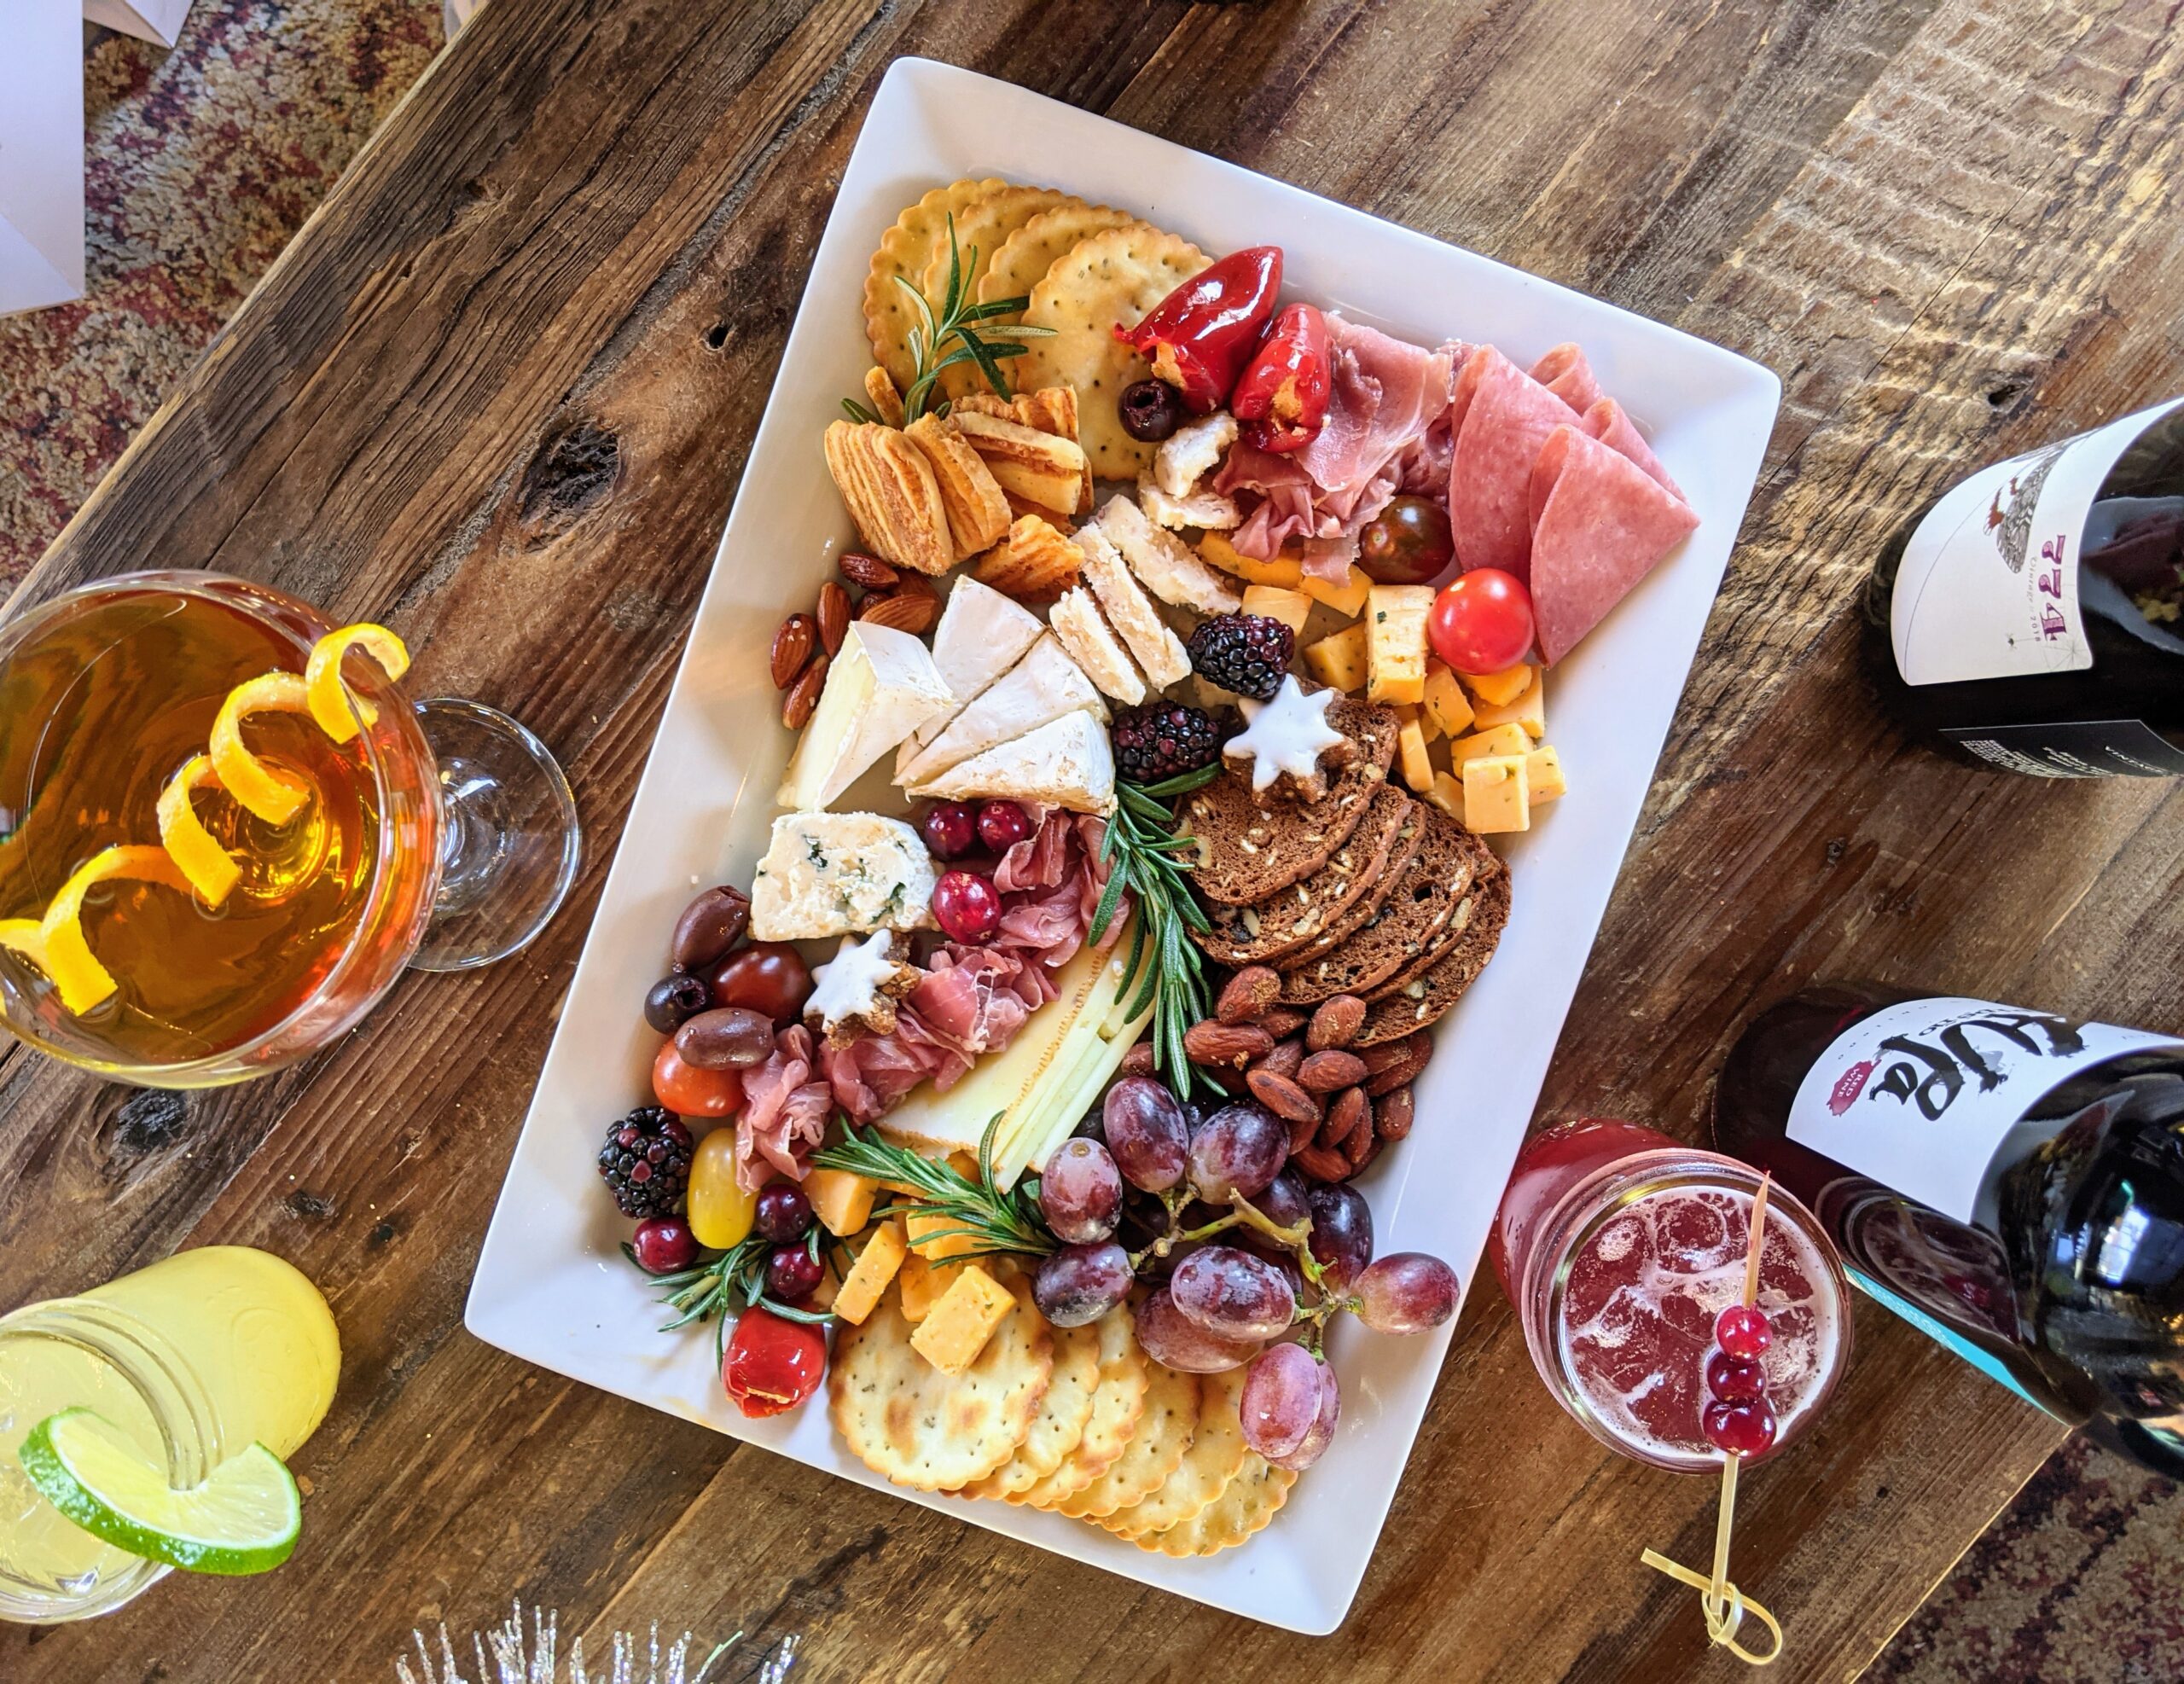
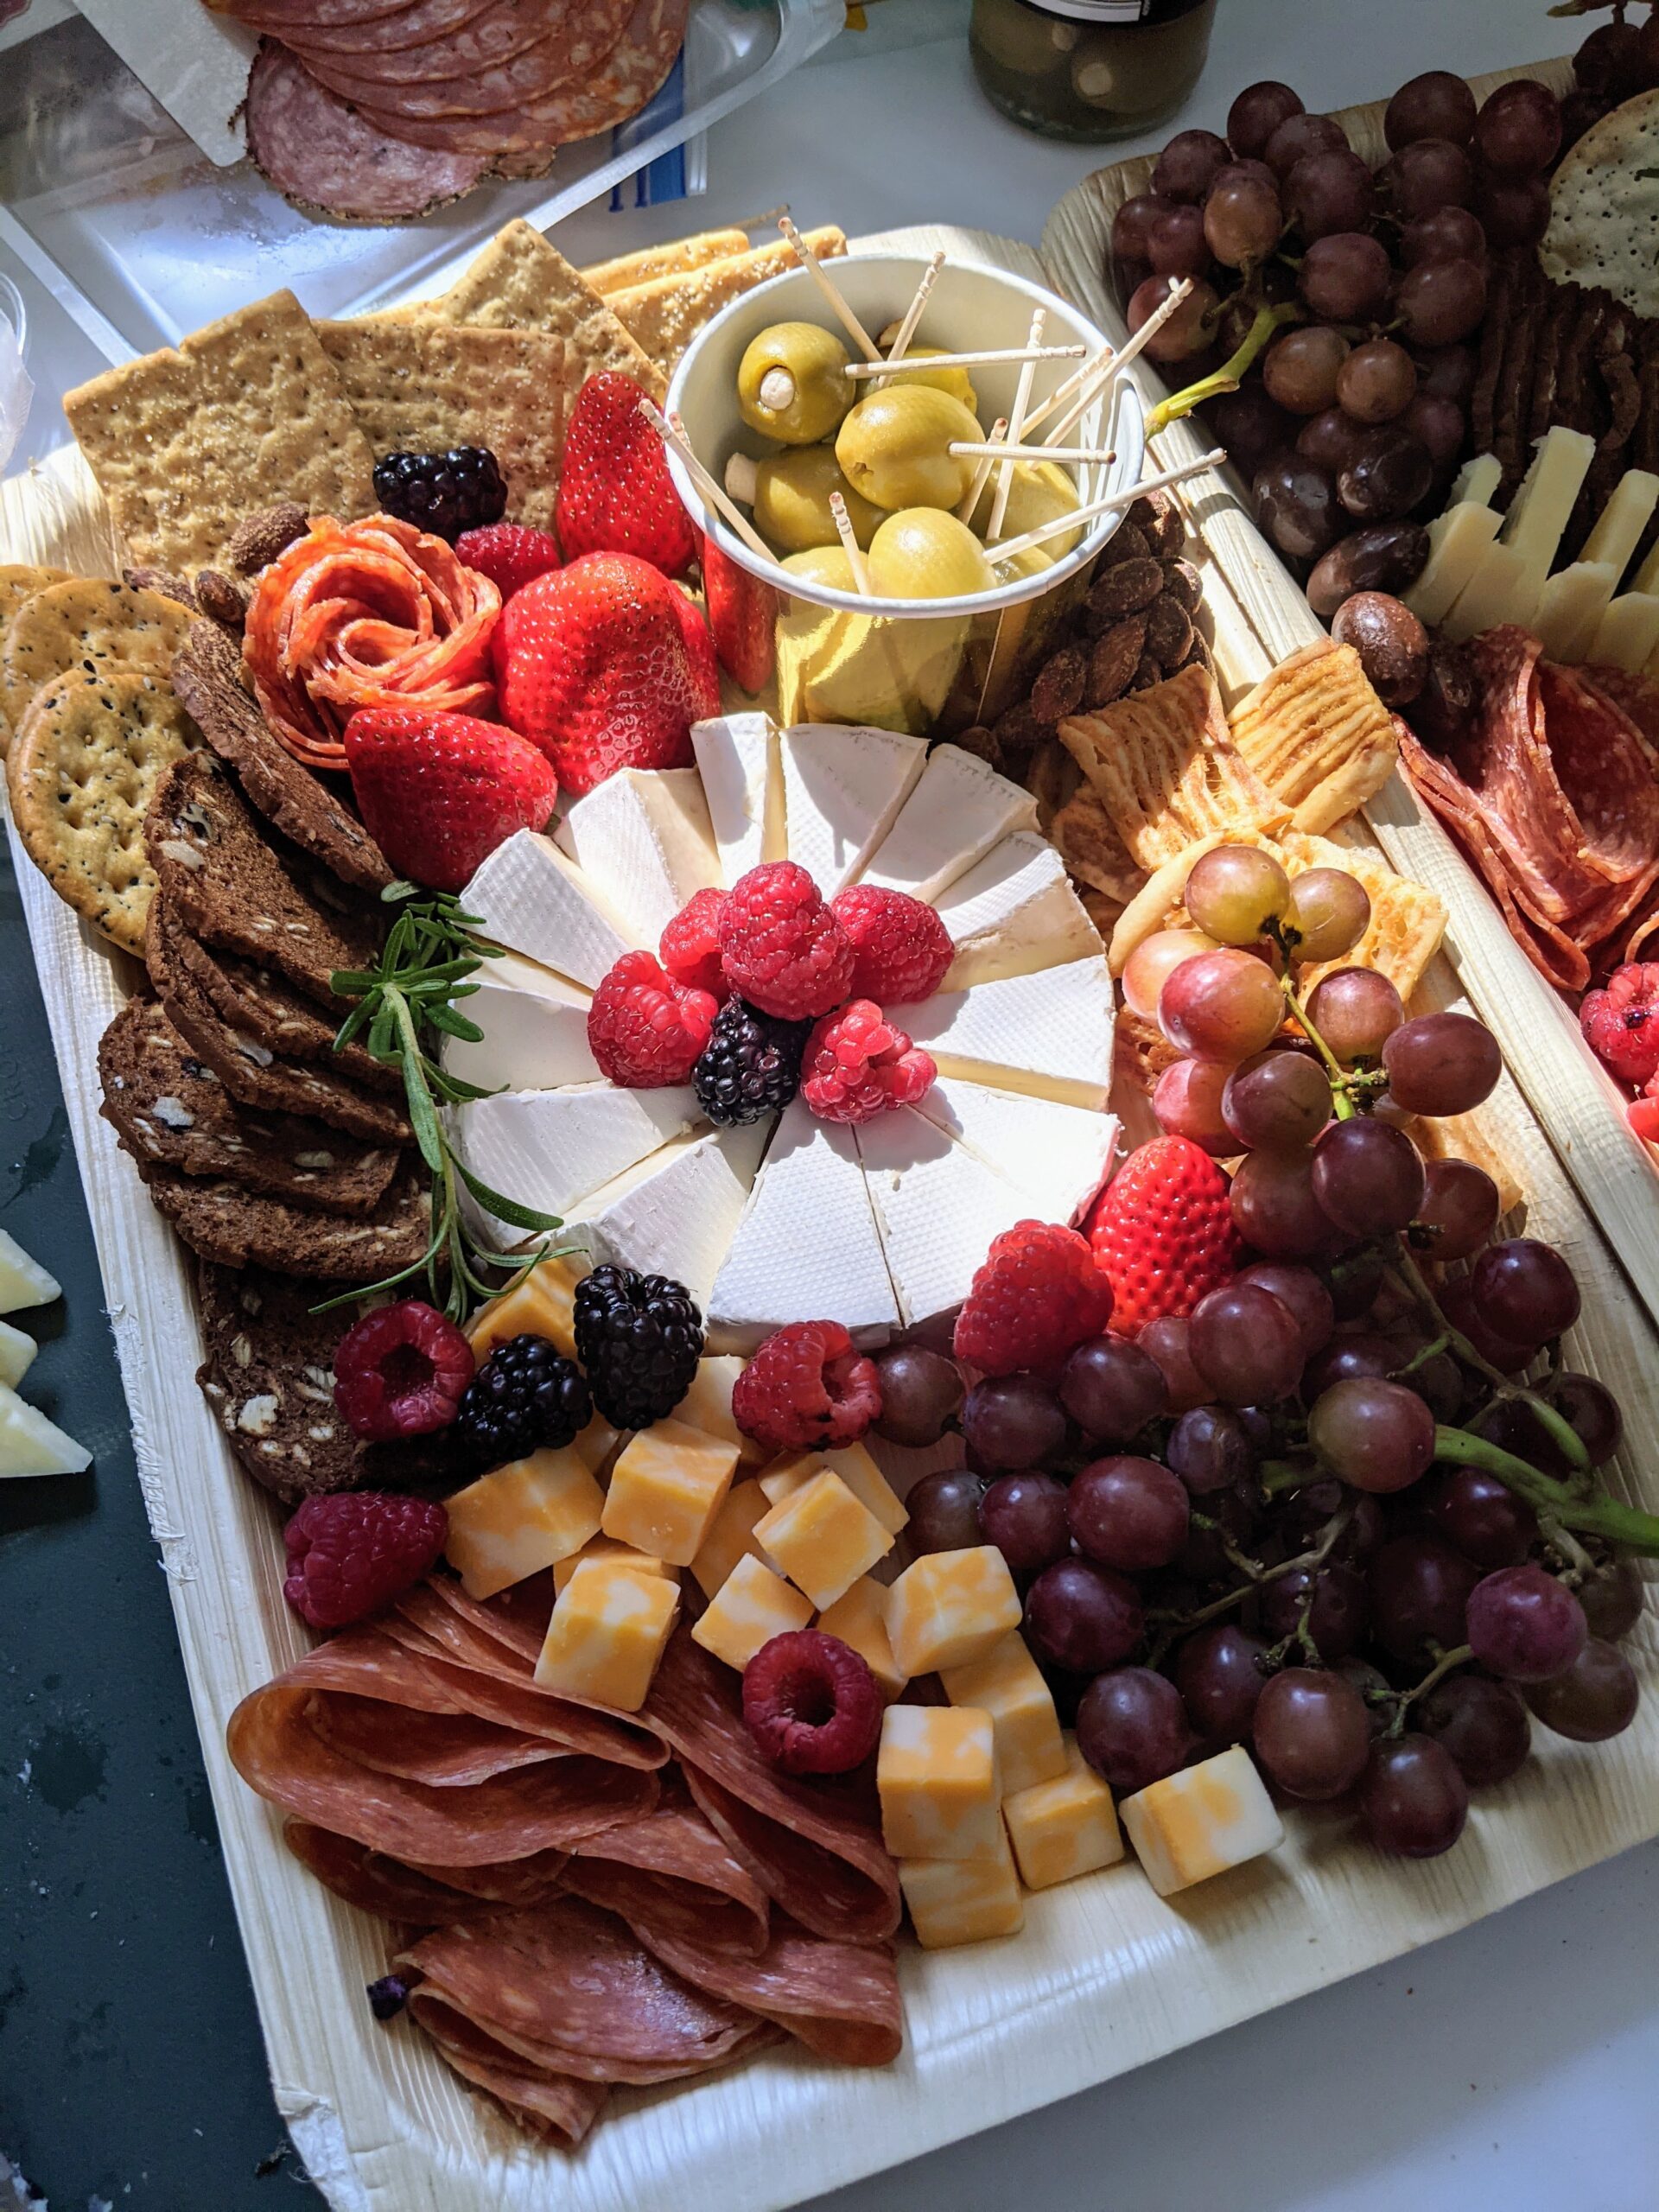
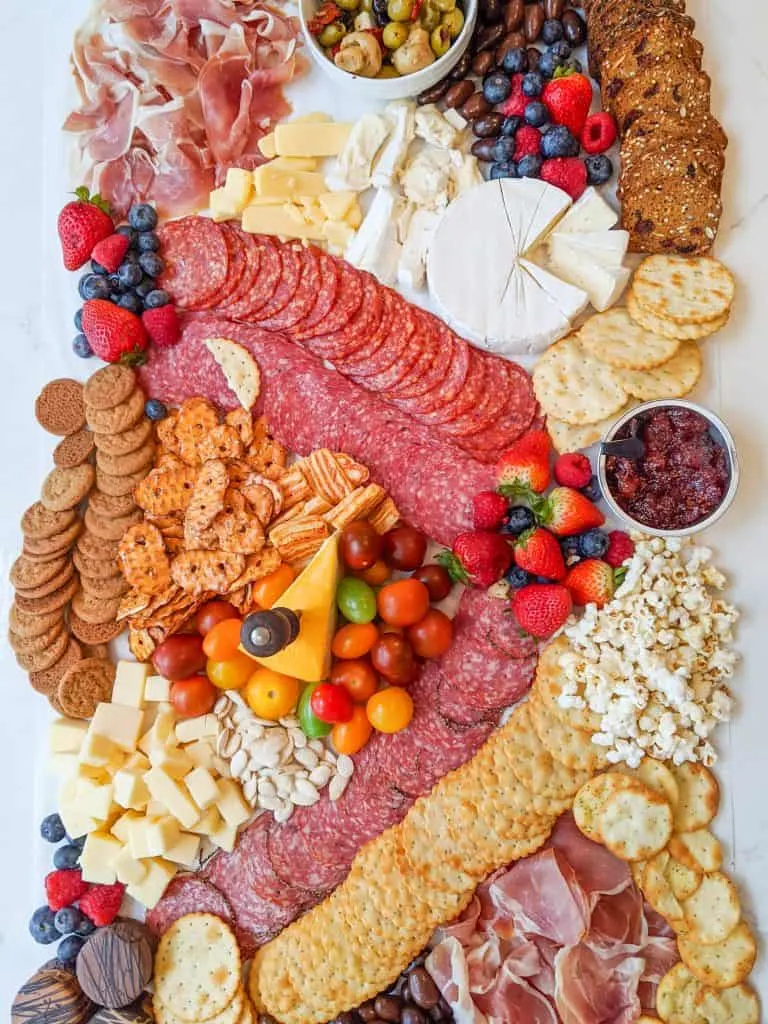
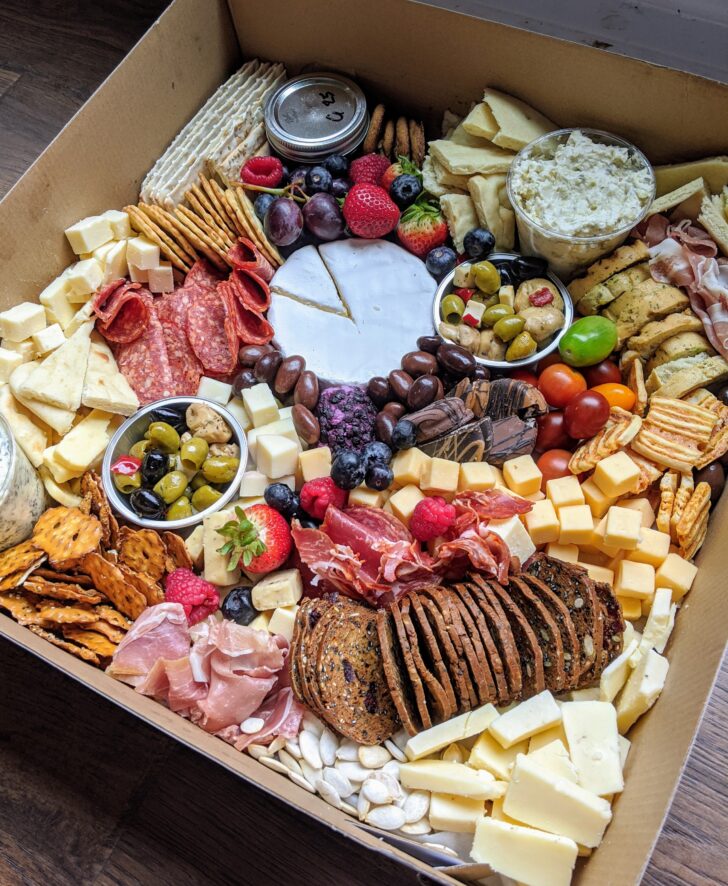
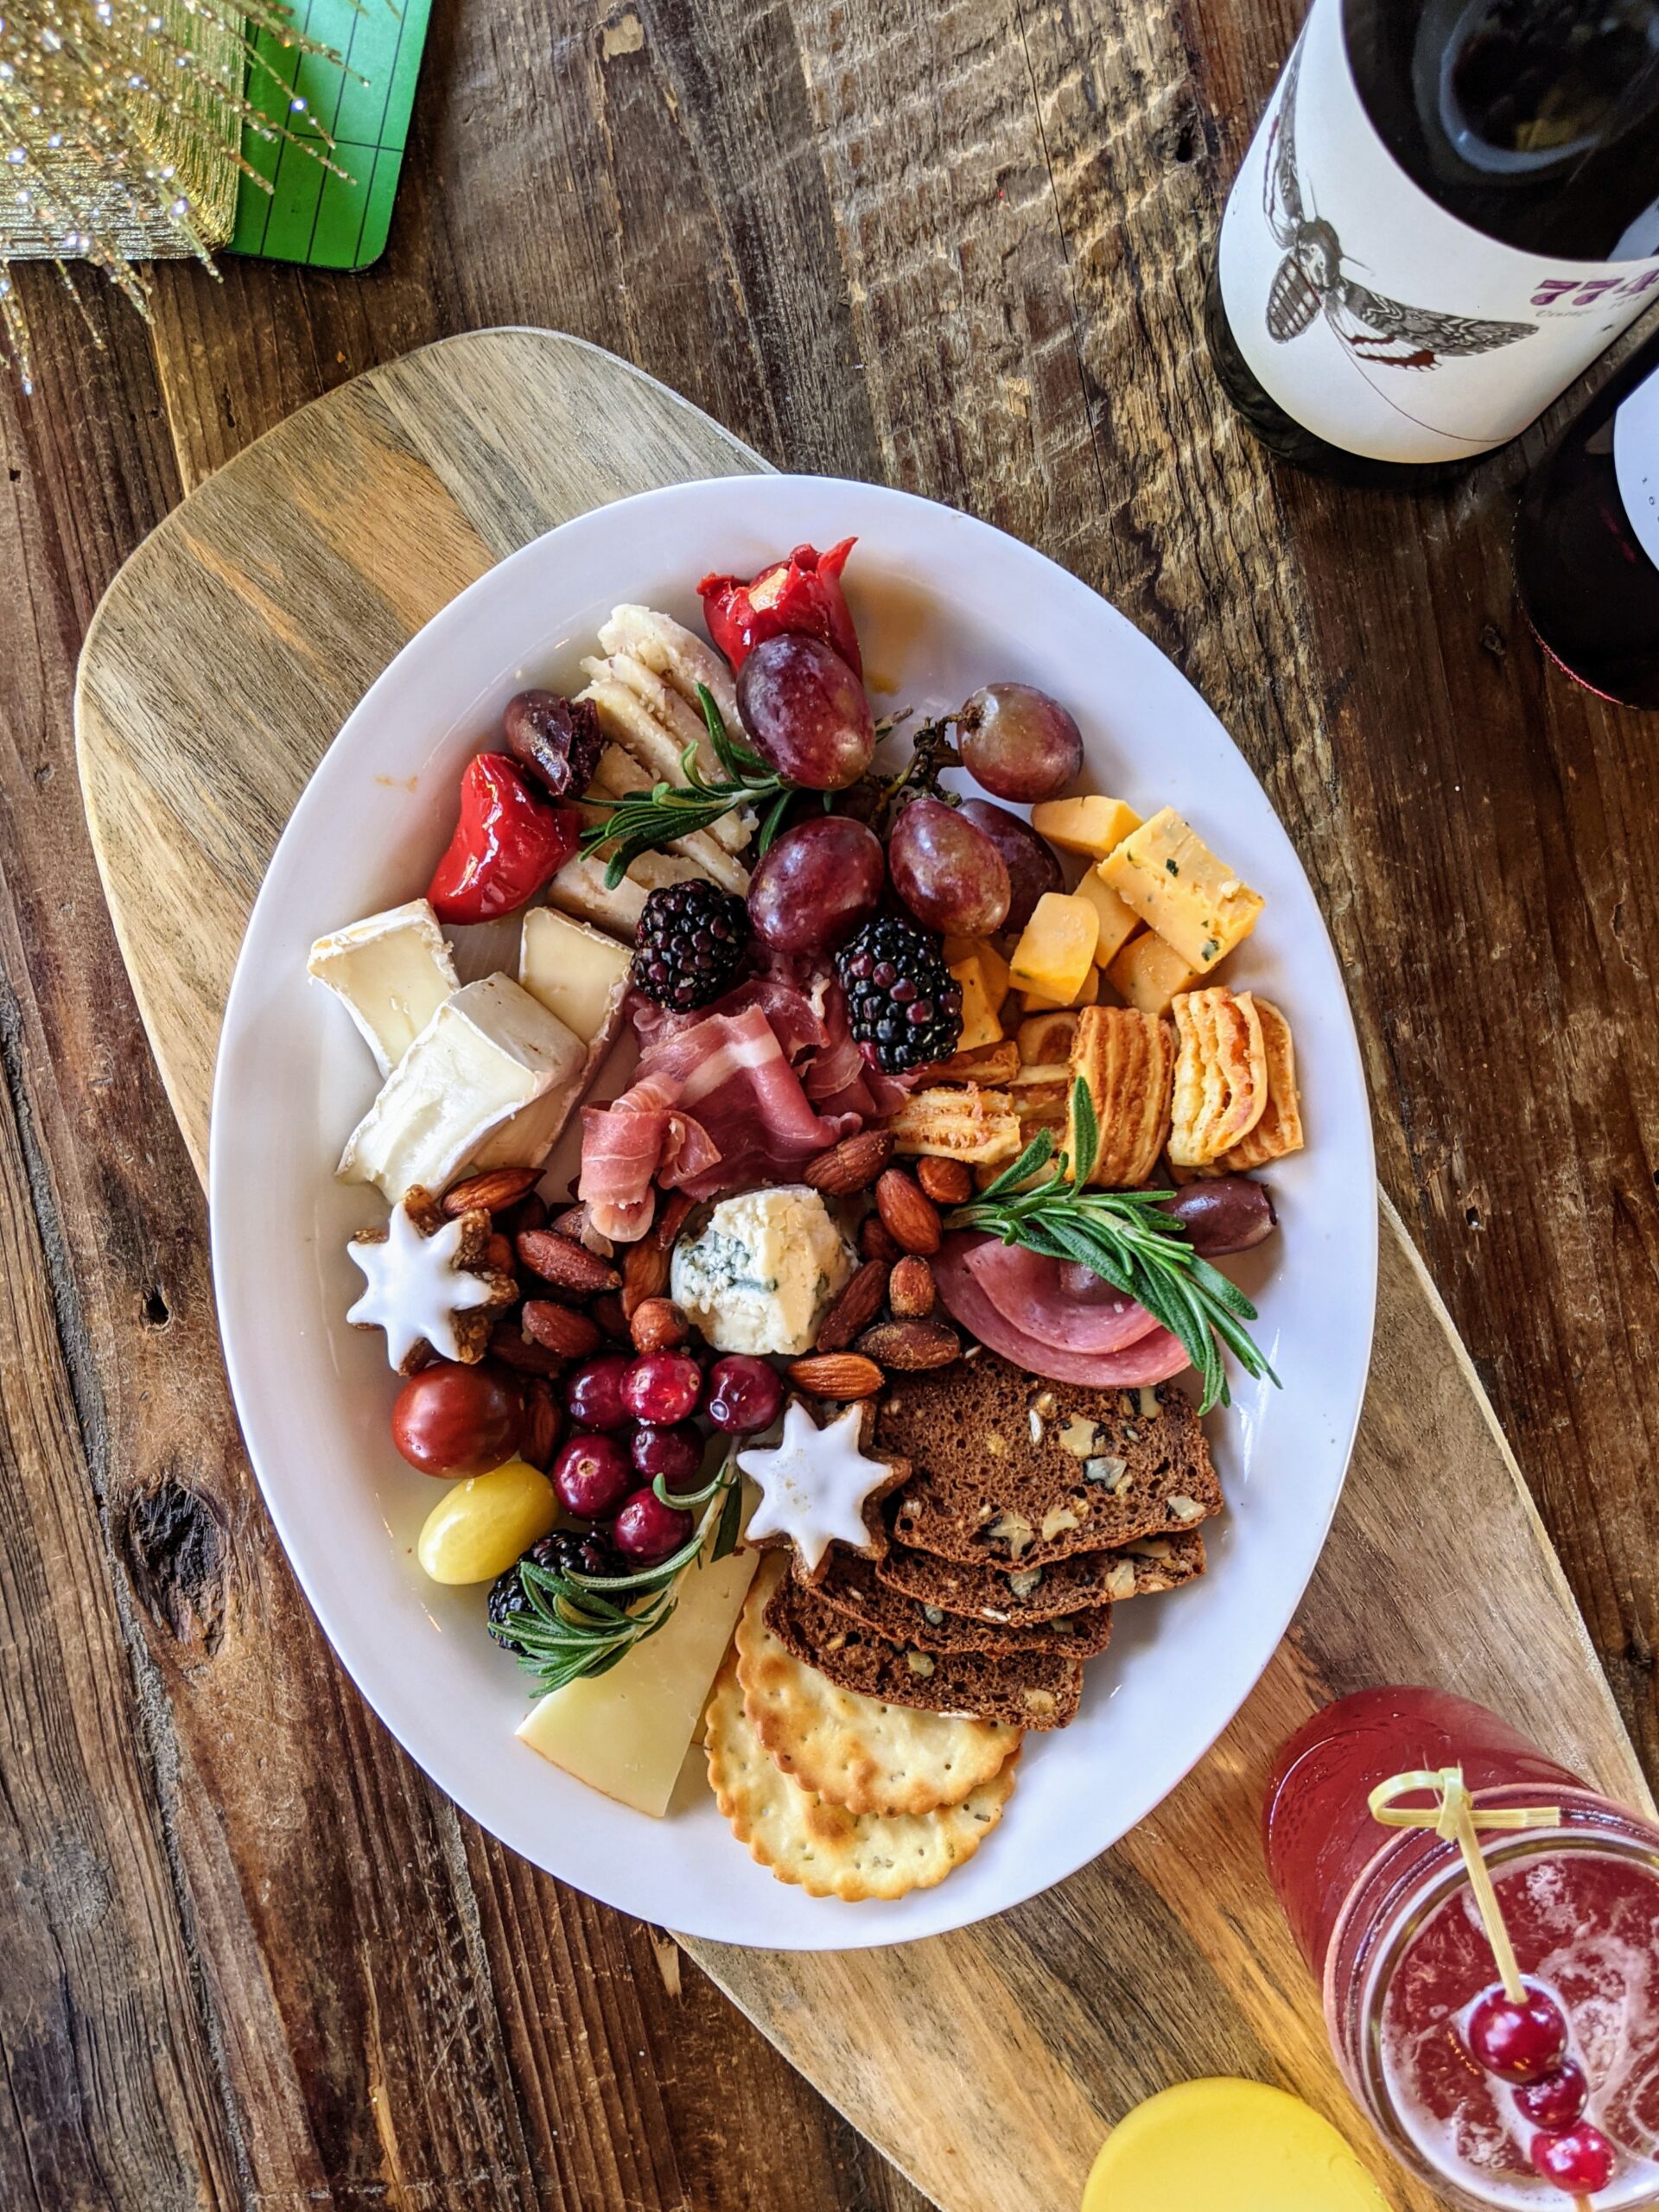
I’ve included suggestions below to help you make a beautiful board on your first try, and several photos of different boards that I’ve made for inspiration!
One of my favorite ways to arrange charcuterie is by using the concepts of “rivers and ponds,” making wavy ribbons of cheese or meat and nestling varying sizes of bowls or piles of items next to the “rivers.”
Equipment needed for Charcuterie for 15 People
Here are a few items you’ll need to facilitate your charcuterie spread:
- Toothpicks: Place these close to olives or other small items that can be skewered.
- Serving tongs: Place these around the edges so that your guests can grab their items hands free.
- Small plates: Enough for each of your guests to have two rounds of charcuterie.
- Napkins: Cocktail sized napkins work great!
- Spoons: 1 for each dip, jam or mustard.
- Cheese knives: 1 for each whole block of cheese you plan to serve. I typically leave brie and blue cheese wedges whole.
Timing for Arranging Charcuterie
Allow yourself at least an hour to arrange your board. You will get faster the more that you do! You can reduce this time by having all of your cheese and veggies pre-sliced.
Many hands make the work light, so recruit a friend to help. Remember to give yourself enough time to get the board together!
This charcuterie can be arranged a day in advance and kept in the fridge. I recommend using press and seal for a tight seal to keep everything from getting dry and adding the crackers right before serving.
Remember, cheese can sit out at room temperature for up to 4 hours. This includes the time it’s been out while you’re doing the arranging. So, encourage your guests to enjoy the charcuterie board as soon as they arrive.

How To: Charcuterie for 15 People
Ingredients
- 1 soft cheese round, brie, camembert
- 6 ounces goat cheese log, plain, herbed or fruit covered
- 20 ounces affordable cheese, pre-cut cheddar, Colby jack, pepper jack or gouda
- 10 ounces specialty cheese, Bleu cheese wedges, aged cheddar, truffle cheese, wine-soaked cheese, Manchego, fontina, Port Salut
- 15 ounces affordable meat, salami or summer sausage
- 10 ounces crackers or bread, pretzels, breadsticks, crostini
- 8 ounces specialty meats, prosciutto, speck, coppa, brasciola, sliced chorizo, iberico ham, capicola
- 2 varieties of jam, honey or mustard, pepper jelly, fig jam, spicy mustard
- 8 ounces nuts, spiced, candied or chocolate covered
- 8 ounces olives or pickled goods, peppadew peppers and stuffed olives are favorites
- 10 ounces prepared dips, spinach and artichoke, hummus, French onion dip (place next to crackers and cut veggies)
- 8 ounces fruit, blackberries, blueberries, raspberries, grapes, apricots, pear, apple, cherries, dried cranberries
- 8 ounces vegetables, sweet peppers, sliced carrots, grape tomatoes, sliced cucumbers
- 8 ounces dessert, small cookies, bite sized dessert, truffles, pirouette cookies, chocolates
- fresh herbs for garnish, I like rosemary best
Equipment
- 100 toothpicks place in shot glasses by olives and cubed cheeses
- 30 small plates enough for each guest to have two rounds of charcuterie
- 30 napkins cocktail sized
- 2 serving tongs
- 1 small spoon for each dip, jam or mustard
- 1 cheese knife for each unsliced block of cheese
- 30 forks enough for each guest to have two rounds of charcuterie
Instructions
- Decide the location for your charcuterie board. You can place it directly on a sanitized counter lined with parchment paper, or on a large serving tray.
- Add height: Place 2-3 small bowls on the surface for dips and nuts. If you have any pedestal servers/cake pedestals, add them now!
- Dips and jams: Place these in small bowls or in their original containers, with a small spoon.
- Add cheese: Cheese is truly the star of charcuterie tables, although charcuterie technically means meat! Cheese is ALWAYS the first thing to be eaten! Place a variety of sliced and whole chunks of cheese on the table. If you place a whole chunk of cheese (like a wheel of brie, or blue cheese wedge), make sure you have a cheese knife placed by it, and slice the first slice. People are typically timid about being the first ones to cut into a whole piece of cheese, so make sure you do it for them. Arrange sliced cheeses in both tall piles and lines for visual interest.
- Add fruit and veggies: I typically add fruit and veggies next because I want to make sure that there is COLOR interspersed throughout the grazing table. If you hold these items until last, you'll have to squeeze them into the empty spaces. Add these colorful items next to the cheese.
- Add meat: Now, it's time to add the meat! I like making tall piles of salami circles. You can also lay meat slices next to your lines of cheese slices, or in a circle around a chunk of cheese. Make a few salami roses for visual interest, if you have time!
- Add everything else: Now, add nuts, desserts and crackers. Use these ingredients to fill in all of the gaps. If you don't have space for all of it, no worries! You can replenish these items throughout the night.
- Garnish with herbs: I like to tuck the fresh green herbs in areas where there is too much of one color. For example, between a pile of salami and nuts, or between two light colored cheeses. It's a great way to add interest to areas that are a little bit ugly! You can also use berries for garnish.
This is so, so helpful, thank you! We are making charcuterie cups for 15 and knowing appx how much to buy is a huge weight off my shoulders.
I am so glad it helped! I know they’ll turn out great!
You made my day! Hope it helps! 🙂
Hi what size board for 15 people
Hi Cindy! You’ll need something in the neighborhood of 16×24 inches. I have also used my 20” round circle board. You can always put overflow in bowls or baskets around the board!
Thank you for posting this! Just wondering how many crackers/pretzel type things would you add to this board?
Hi Veronica! Great question. I usually buy 2-3 varieties of crackers or pretzels. I really like using seasoned pretzel thins and putting those next to the dips! Let me know if you have any more questions!
Can you send me the list of items to buy?
Hi Yvette! Yes, of course! Here they are:
1 soft cheese round (brie or camembert)
6 ounces goat cheese log (plain, herbed or fruit covered)
20 ounces affordable cheese (I like to buy pre-cut or pre-cubed cheddar, colby jack or gouda)
10 ounces specialty cheese (Bleu cheese wedges, aged cheddar, truggle cheese, wine soaked cheese, manchego, fontina, port salut)
15 ounces affordable meat (salami or summer sausage)
8 ounces specialty meats (prosciutto, speck, coppa, brasciola, sliced chorizo, iberico ham, capicola)
2 varieties of jam or mustard
8 ounces nuts (spiced, candied or chocolate covered)
8 ounces olives or pickled goods (peppadew peppers and stuffed olives are favorites)
10 ounces prepared dips (place next to crackers)
8 ounces berries
8 ounces vegetables (peppers, sliced carrots, grape tomatoes)
8 ounces dessert (small cookies, bite sized dessert, truffles, pirouette cookies, chocolates)
Where is the list of items to buy!?
Hi Rachel! Sorry, it looks like the recipe card dropped off the post! I have it inserted again.
Pingback: How to Make a Grazing Table for 40 People + PRINTABLE list